
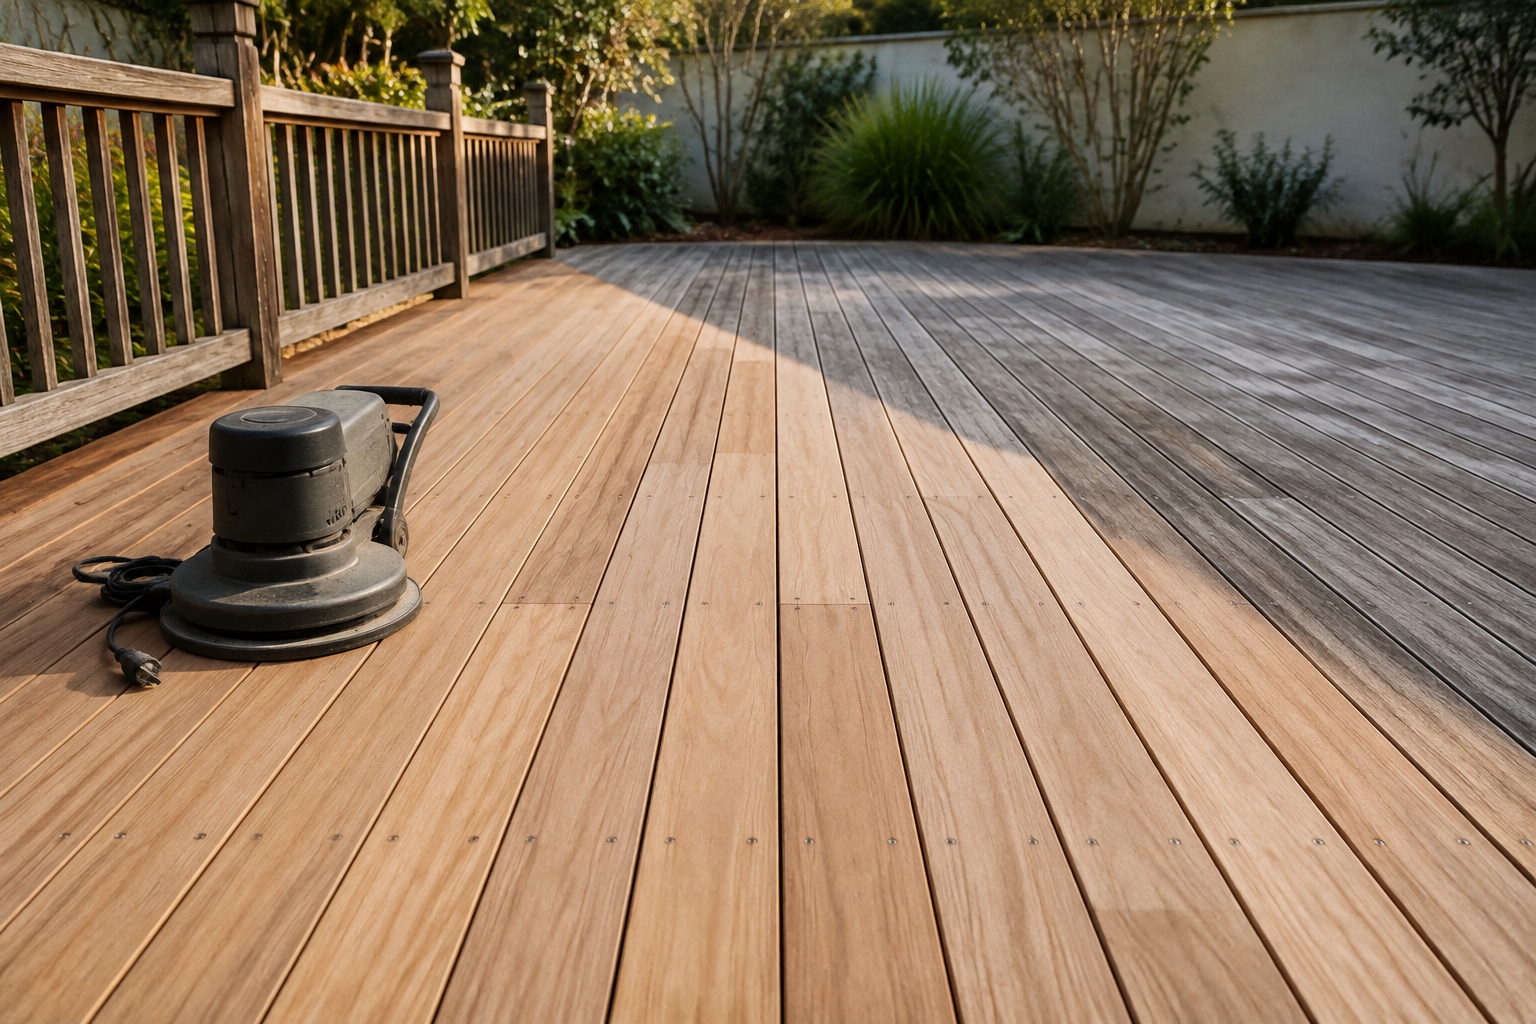
Sanding comes before oiling. It removes weathered fibres, old coating remnants and surface contamination so the oil soaks into clean timber and absorbs evenly. The deck then needs to be clean and dry before any oil goes on.
Not every deck needs a full sand every time. Whether you are sanding back to bare timber or just cleaning and recoating depends on how far the existing finish has gone.
The Short Version
- Sand, then oil. Never the other way around. Oil over weathered grey timber seals in the damage rather than removing it.
- Dry timber matters as much as clean timber. Oil applied to damp boards will not penetrate properly and can go blotchy.
- Not every deck needs a full sand. A maintained deck with a sound oil finish often just needs cleaning and a maintenance coat.
- Thick, flaking coatings need stripping, not sanding. Sanding a built-up film finish clogs the paper and smears the coating.
- Timber species changes the product. Dense hardwoods absorb very differently from softer, more porous species.
- Follow the product data sheet over any general rule. Recoat and cure times vary widely by product, weather and timber.
Why Does Sanding Come Before Oiling?
Because oil is a penetrating finish, and it can only penetrate what it can reach. A weathered deck has a layer of degraded, greyed timber fibres on the surface, along with dirt, mould and whatever remains of the last coating. Oil applied over that soaks into the damaged layer instead of the sound timber underneath, and the result looks patchy and fails early.
Sanding, where it is the right method, removes:
- Weathered and greyed surface fibres, which is the layer UV has broken down
- Old oil and coating remnants where the finish is thin enough to sand
- Dirt and surface contamination ground into the grain
- Minor surface imperfections, raised grain and splinters
What properly sanded timber gives you: more even colour once oiled, a smoother surface underfoot, and consistent absorption across the boards. Most of the blotchy, uneven results people blame on the oil are actually preparation failures.
Not every coating responds to sanding. A thick, flaking, built-up film finish will clog abrasive paper and smear rather than come off cleanly. Those need stripping first. The decision between stripping and sanding depends on the type and condition of what is already on the timber, which is worth establishing before hiring a sander.
What Is the Correct Order for Deck Sanding and Oiling?
- Inspect the deck. Board condition, loose or protruding fixings, rot at bearer contact points, and what finish is actually on it.
- Identify the existing coating. Penetrating oil, decking stain or a film-forming finish. This determines everything that follows.
- Repair before you prepare. Replace damaged boards, punch down or replace proud fixings. Sanding over a raised screw head ruins a belt in one pass.
- Clean the surface. Remove dirt, mould, lichen and general grime.
- Strip unsuitable coatings where sanding will not remove them cleanly.
- Let the timber dry to a suitable moisture content. This is the step most commonly rushed and most commonly regretted.
- Sand with an appropriate grit progression, working with the grain rather than across it.
- Remove all dust and residue. Vacuum rather than sweep, and get it out of the board gaps.
- Confirm the timber is clean and dry before opening anything.
- Apply the oil to the manufacturer’s instructions, maintaining a wet edge along full board lengths.
- Apply additional coats where the product specifies them, respecting the stated recoat window.
- Allow the finish to cure before furniture and normal traffic go back on.
Drying, recoating and curing times vary with the product, the timber, temperature and humidity. The manufacturer’s instructions beat any general timetable, including this one. A cool, humid Sydney week in July is a different job from a dry week in November.
Not every deck needs the full sequence. A deck maintained on schedule with a sound penetrating oil finish often needs only cleaning and a maintenance coat. Reserve the full restoration for timber that has actually deteriorated.
What Type of Oil Is Best?
There is no single best deck oil. The right choice follows the timber species, its condition, what was on it before, the exposure, the appearance you want and how much ongoing maintenance you are prepared to do.
Oil against stain
Deck oil and decking stain compared
| Factor | Penetrating oil | Decking stain |
|---|---|---|
| How it works | Soaks into the timber | Adds pigment, some products build a film |
| Appearance | Enhances natural grain and colour | More colour control, can obscure grain |
| Wear pattern | Wears back gradually and evenly | Film products can peel or flake at wear points |
| Recoating | Usually clean and reapply | May need more preparation depending on the product |
| Maintenance interval | More frequent, less involved each time | Less frequent, more involved when due |
Formulations vary and some products combine characteristics of both. Treat this as a general guide rather than a fixed rule.
What to look for in a deck oil
- UV protection, which is what slows the timber greying again
- Water repellency appropriate to how exposed the deck is
- Compatibility with the timber and any existing finish
- The colour and sheen you actually want, tested on an offcut or a hidden board first
- Reapplication requirements, since a product needing annual attention is a commitment
- The manufacturer’s stated preparation requirements, which differ more than people expect
Does timber species matter?
Considerably. Dense Australian hardwoods such as spotted gum, blackbutt and merbau absorb finishes differently from softer, more porous species, and a product that soaks readily into treated pine can sit on the surface of a dense hardwood and stay tacky.
Timber that has been previously coated with something else may also need additional preparation before a new system will take. Matching the finishing system to the timber and the site conditions matters more than picking a premium product and assuming it suits everything.
How Much Does Professional Deck Sanding and Oiling Cost?
Pricing depends on far more than deck area, which is why most contractors quote from an inspection rather than a rate. The variables:
- Deck size in square metres, the starting point but not the driver
- Timber condition, and how deep the weathering goes
- Existing coating and whether it needs stripping rather than sanding
- Repairs, board replacement and fixing work before preparation starts
- Access, since an elevated deck or one reached through a house changes everything
- Stairs and multiple levels, which are hand-sanded and slow
- Balustrades and handrails, often more labour than the deck itself
- Oil selected and number of coats
Stairs, balustrades and handrails are where deck quotes diverge. A flat, open deck sands with a machine at a predictable rate. Stair treads, risers, balusters and handrail profiles are hand work, and a deck with a full balustrade run can carry more labour in the rails than in the floor. If two quotes are far apart, this is usually where the difference sits, so check whether balustrades are included or excluded.
Costs rise most when: the timber is heavily weathered and needs an aggressive first cut, an old coating resists removal, boards need replacing, or the deck has stairs, multiple levels or restricted access. Larger decks cost more in total but usually less per square metre, since setup and equipment do not scale down.
An on-site assessment is the only reliable way to price this work, because the condition of the existing finish is not something anyone can judge from a photograph.
How Often Should You Sand and Oil a Deck?
No fixed schedule applies to every deck. It depends on sun exposure, rainfall, foot traffic, timber species, the coating used and the condition of the existing finish. A north-facing deck with no cover and a shaded south-facing one on the same house will not need the same attention.
Signs a deck needs attention:
- Faded colour or greying timber, the most visible signal
- Dry-looking boards that no longer have any depth to the colour
- Water no longer beading on the surface
- Peeling or deteriorating finish in patches
- Rough or splintering fibres underfoot
- Uneven appearance between covered and exposed sections
These do not automatically mean a full sand. Loss of water repellency on an otherwise sound finish is a cleaning and maintenance coat. Widespread greying and rough fibre is a sanding job. The difference is worth establishing before committing to the bigger project.
Regular maintenance is what avoids full restorations. A deck cleaned and recoated on schedule may never need sanding back to bare timber again. A deck left for five years will, and that is the more expensive path.
Mistakes to Avoid
Sanding mistakes
- Starting too coarse, which leaves scratch marks the oil then highlights
- Skipping grits in the progression, leaving marks from the previous pass
- Sanding across the grain, which shows permanently once oiled
- Sanding over proud fixings, tearing the paper and gouging the board
- Leaving dust in the board gaps, which bleeds back out into the wet oil
- Sanding damp timber, which clogs abrasive and raises grain unevenly
Oiling mistakes
- Oiling timber that is not dry, the single most common cause of blotchy results
- Applying too heavily, which leaves a sticky surface that never fully cures
- Not maintaining a wet edge, producing visible lap marks along board lengths
- Working in direct sun or high heat, which flashes the oil off before it penetrates
- Ignoring the recoat window stated on the product
- Putting furniture back too early, which prints the finish
What happens if you oil without sanding? The oil sits on degraded fibres rather than sound timber. It will look acceptable for a few weeks, then wear off unevenly as the damaged layer beneath it continues to break down, taking the finish with it. You end up doing the job twice.
DIY or Professional?
DIY suits a smaller, straightforward, single-level deck where the timber is in reasonable condition and there is no balustrade to speak of. It needs hired sanding equipment, patience with grit progression, dust control, and a weather window long enough to sand, dry and coat.
Professional makes sense on larger or heavily weathered decks, where old coatings need stripping, where repairs are needed, and where stairs, multiple levels or balustrades turn it into hand work. The decision is a genuine trade-off between cost and the time, equipment and risk of doing it yourself.
Deck restoration often sits alongside broader property work. Where a deck is being done as part of an exterior refresh, residential painting can share access and setup. In strata settings, shared decks and balconies usually fall under a strata maintenance scope rather than an individual owner’s.
Frequently Asked Questions
Do you sand or oil a deck first?
Sand first, always. Oil is a penetrating finish, so it needs clean, sound timber to soak into. A weathered deck carries a layer of degraded grey fibres, dirt and old coating remnants, and oil applied over that penetrates the damaged layer rather than the good timber underneath. The result looks patchy and wears off unevenly within months. After sanding, remove all dust and make sure the timber is dry before any oil goes on.
Does a deck need to be fully sanded every time?
No. A deck maintained on schedule with a sound penetrating oil finish can usually be cleaned and given a maintenance coat without sanding back to bare timber. Full sanding is for timber that has greyed, roughened or where the existing coating has deteriorated. There is a real difference between routine cleaning, a maintenance coat, light preparation, a full sand and a strip and refinish, and matching the right level of work to the actual condition saves considerable money.
How long should you wait between sanding and oiling a deck?
Long enough for the timber to be genuinely dry and completely free of sanding dust, which depends on the weather rather than a fixed number of hours. Oiling damp timber is the most common cause of blotchy, slow-curing results. Vacuum rather than sweep, clear the board gaps, and check the manufacturer’s guidance on acceptable moisture content. In cool or humid conditions, allow considerably longer than you would in dry weather.
What happens if you oil a deck without sanding it?
The oil sits on top of weathered, degraded fibres instead of penetrating sound timber. It usually looks fine for a few weeks, then wears off unevenly as the damaged surface layer beneath continues to break down and takes the finish with it. You get a patchy deck and a job that has to be done again properly, which costs more than doing it once. If the timber has greyed, that layer needs to come off first.
How much does professional deck sanding and oiling cost?
It varies too widely for a single figure, because condition drives it more than area. The main variables are how weathered the timber is, whether an existing coating needs stripping rather than sanding, repairs to boards and fixings, access, and whether the deck has stairs, multiple levels or balustrades. Balustrades and stairs are hand work and often carry more labour than the deck floor, so check whether a quote includes them. An on-site assessment is the only reliable way to price it.
Thinking About Restoring Your Deck?
Tell us the timber, roughly how long since it was last done, and whether there are stairs or balustrades. Those three answers tell us most of what decides the job.
0468 814 249
or
request a free quote
Servicing Sydney wide, with no call out fee. Deck work often pairs with exterior painting to share access and setup.